Build a User Management App with Next.js
This tutorial demonstrates how to build a basic user management app. The app authenticates and identifies the user, stores their profile information in the database, and allows the user to log in, update their profile details, and upload a profile photo. The app uses:
- Supabase Database - a Postgres database for storing your user data and Row Level Security so data is protected and users can only access their own information.
- Supabase Auth - users log in through magic links sent to their email (without having to set up passwords).
- Supabase Storage - users can upload a profile photo.
If you get stuck while working through this guide, refer to the full example on GitHub.
Project setup
Before we start building we're going to set up our Database and API. This is as simple as starting a new Project in Supabase and then creating a "schema" inside the database.
Create a project
- Create a new project in the Supabase Dashboard.
- Enter your project details.
- Wait for the new database to launch.
Set up the database schema
Now we are going to set up the database schema. We can use the "User Management Starter" quickstart in the SQL Editor, or you can just copy/paste the SQL from below and run it yourself.
Get the API Keys
Now that you've created some database tables, you are ready to insert data using the auto-generated API.
We just need to get the Project URL and anon key from the API settings.
- Go to the API Settings page in the Dashboard.
- Find your Project
URL,anon, andservice_rolekeys on this page.
Building the app
Let's start building the Next.js app from scratch.
Initialize a Next.js app
We can use create-next-app to initialize an app called supabase-nextjs:
Then install the Supabase client library: supabase-js
_10npm install @supabase/supabase-js
And finally we want to save the environment variables in a .env.local.
Create a .env.local file at the root of the project, and paste the API URL and the anon key that you copied earlier.
App styling (optional)
An optional step is to update the CSS file app/globals.css to make the app look nice.
You can find the full contents of this file here.
Supabase Server-Side Auth
Next.js is a highly versatile framework offering pre-rendering at build time (SSG), server-side rendering at request time (SSR), API routes, and middleware edge-functions.
To better integrate with the framework, we've created the @supabase/ssr package for Server-Side Auth. It has all the functionalities to quickly configure your Supabase project to use cookies for storing user sessions. See the Next.js Server-Side Auth guide for more information.
Install the package for Next.js.
_10npm install @supabase/ssr
Supabase utilities
There are two different types of clients in Supabase:
- Client Component client - To access Supabase from Client Components, which run in the browser.
- Server Component client - To access Supabase from Server Components, Server Actions, and Route Handlers, which run only on the server.
It is recommended to create the following essential utilities files for creating clients, and organize them within utils/supabase at the root of the project.
Next.js middleware
Since Server Components can't write cookies, you need middleware to refresh expired Auth tokens and store them. This is accomplished by:
- Refreshing the Auth token with the call to
supabase.auth.getUser. - Passing the refreshed Auth token to Server Components through
request.cookies.set, so they don't attempt to refresh the same token themselves. - Passing the refreshed Auth token to the browser, so it replaces the old token. This is done with
response.cookies.set.
You could also add a matcher, so that the middleware only runs on route that access Supabase. For more information, check out this documentation.
Be careful when protecting pages. The server gets the user session from the cookies, which can be spoofed by anyone.
Always use supabase.auth.getUser() to protect pages and user data.
Never trust supabase.auth.getSession() inside server code such as middleware. It isn't guaranteed to revalidate the Auth token.
It's safe to trust getUser() because it sends a request to the Supabase Auth server every time to revalidate the Auth token.
Set up a login page
Login and Signup form
Create a login/signup page for your application:
Navigate to http://localhost:3000/login. You should see your login form, but it's not yet hooked up to the actual login function. Next, you need to create the login/signup actions. They will:
- Retrieve the user's information.
- Send that information to Supabase as a signup request, which in turns will send a confirmation email.
- Handle any error that arises.
Note that cookies is called before any calls to Supabase, which opts fetch calls out of Next.js's caching. This is important for authenticated data fetches, to ensure that users get access only to their own data.
See the Next.js docs to learn more about opting out of data caching.
Proof Key for Code Exchange (PKCE)
Upon sign up, an email will be sent to the user with a unique hash code. This key can then be sent back to the application for verification, thus authenticating the user. The method is referred to as Proof Key for Code Exchange (PKCE). As we are employing PKCE in our authentication flow, it is necessary to create a route handler responsible for exchanging the code for a session.
In the following code snippet, we perform the following steps:
- Retrieve the code sent back from the Supabase Auth server using the
token_hashquery parameter. - Exchange this code for a session, which we store in our chosen storage mechanism (in this case, cookies).
- Finally, we redirect the user to the
accountpage.
Did you know? You could also customize emails sent out to new users, including the email's looks, content, and query parameters. Check out the settings of your project.
Account page
After a user is signed in we can allow them to edit their profile details and manage their account.
Let's create a new component for that called AccountForm within the app/account folder.
Create an account page for the AccountForm component we just created
Sign out
Let's create a route handler to handle the signout from the server side. Make sure to check if the user is logged in first!
Launch!
Now that we have all the pages, route handlers and components in place, let's run this in a terminal window:
_10npm run dev
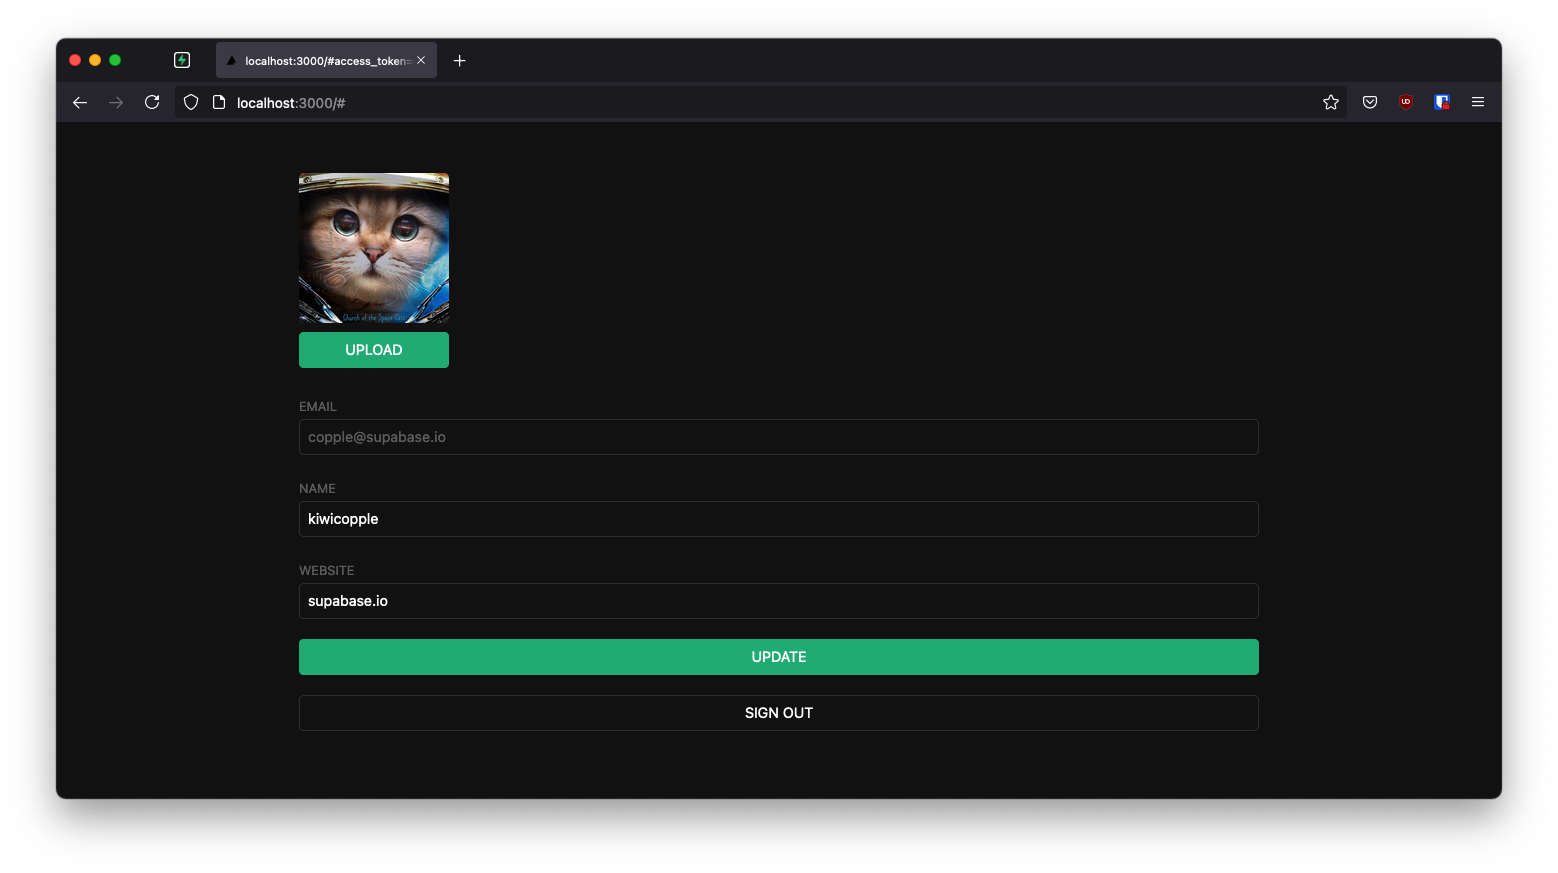
And then open the browser to localhost:3000 and you should see the completed app.
Bonus: Profile photos
Every Supabase project is configured with Storage for managing large files like photos and videos.
Create an upload widget
Let's create an avatar widget for the user so that they can upload a profile photo. We can start by creating a new component:
Add the new widget
And then we can add the widget to the AccountForm component:
At this stage you have a fully functional application!
See also
- See the complete example on GitHub and deploy it to Vercel
- Build a Twitter Clone with the Next.js App Router and Supabase - free egghead course
- Explore the pre-built Auth UI for React
- Explore the Auth Helpers for Next.js
- Explore the Supabase Cache Helpers
- See the Next.js Subscription Payments Starter template on GitHub